1.Introduction
Ample variety stainless steel is used in automotive industry, marine applications, bio-medical implant applications, nuclear reactors, food and beverages industry and other engineering applications. Especially in a nuclear reactor core metals need to perform at extreme temperatures and high- pressure environment may cause stress corrosion cracking (SCC), radiation defects on the metals. In marine applications such as desalination pumps, water jet engines, steering propellers, thrusters and other products which are subjected to the high mechanical load at high pressure in aqueous sea water environment are similar able of cause of fatigue failure and corrosion of the components. In principle, the corrosion and cracking failures of the biomedical implants made out of steel and titanium is no different from other engineering applications. To minimize the failure rate of components due to corrosion and wear, stainless steels that are having high corrosion resistance and strength are typically chosen as an alternative for the manufacturing of the above engineering applications (Fargas et al., 2015; Gujba & Medraj, 2014; Prabhakaran et al., 2018; Montross et al., 2002; Sathyajith et al., 2012).
Despite having better mechanical properties and inherent resistance to corrosion, stainless steel components are constrained to fatigue cracking and stress corrosion cracking under different working conditions. To achieve some specific qualities, those are not attained from fundamental manufacturing methods are obtained when the surface is regularly subjected to surface treatment processes. Alteration of surface integrity of the material has a significant impact on topographical, mechanical and metallurgical properties of engineering components. As needs are, different methods to improve the materials mechanical properties alteration and corrosion resistance of stainless steel, for example, plasma nitriding, low temperature chroming, shot peening, laser shot peening and so forth have been used for various kinds of stainless steel. Among these surface treatment procedures, laser shot peening have numerous points of interest as analysed with different techniques to such an extent that it can create compressive residual stress by an thick surface portion (> 1 mm). Laser shot peened samples posses’ higher surface hardness values, also exhibits exceptional corrosion resistance, wear resistance and fatigue strength than that of unpeened samples. Large casting materials tend to possess internal stresses or torsional residual stresses caused during the manufacturing of the material. Internal stress causes brittleness on the material surface which can lead to sudden breakage or failure of the material. This helps to enrich the toughness and soften the sample surface, before performing laser shot peening.
The corrosion creating impacts of the atmosphere differ from region to territory as indicated by climatic states of temperature, humidity, measure of precipitation and the degree and nature of air contamination show. The utilization of a coated steel sheet metal in any of these kinds of conditions would thus be able to be engineered to give the best blend of coating type, coating thickness, and so forth to accomplish the desired existence life of the metal component.
Zinc plating is a ductile, smooth, enhancing, and corrosion safe wrap up. Not at all like most other generally plated metals, zinc ensures the substrate by giving up itself and subsequently consumes for corrosion before the base metal. For corrosion insurance, trivalent chromates are connected over the zinc. Trivalent Chromates are compound change coatings that include protection and colour deposition. In expansion to boundary assurance, zinc and zinc alloy combinations can respond at scratches and other harm. Zinc-coated steel opposes decay, corrosion, termites, fire, wind, surges and quakes superior to any other engineering material.
In this work the experimental results of laser shot peening of AISI 304 stainless steel with three different energies are reported. Especially, enhancement of surface hardness with different parameters is tested. Using SEM, microstructural analysis of the peened samples without zinc coating and peened samples with Zn coating are studied. EDX test is performed to know the along with SEM to know the surface composition of samples before and after coating. Roughness tests are performed on the coated samples using MAHR roughness test and results are noted. Using Vickers micro hardness test surface hardness of the three differently peened samples is tested.
2. Materials and methods
2.1. Metallic sample preparation
For better machinability and corrosion resistance AISI 304 Austenitic stainless steel is chosen for Laser shot peening process and the chemical composition of AISI 304 is given the table 1. The as used AISI 304 Austenitic stainless steel is claimed as uncoated sample in further experimental works. Firstly, the chemical composition of as given metal is studied for further preparation of sample for laser shot peening process.
Table 1 AISI 304 chemical composition.
| Component | Wt.% |
|---|---|
| C | Max 0.08 |
| Cr | 18-20 |
| Fe | 66.345 - 74 |
| Mn | Max 2 |
| Ni | 8 - 10.5 |
| P | Max 0.045 |
| S | Max 0.03 |
| Si | Max 1 |
Austenitic stainless steels advantage from high flexibility and strength. Austenitic steels are the most widely used in industrial applications among all the stainless steel grades. An Austenite 304 steel sample is cut in to four equal sample pieces of rectangular shape with dimensions 50mm×20mm×5mm.
The annealing heat treatment was carried out in a box furnace at 900 ̊C for duration of 6 hour and undergoes slow cooling at room temperature. The samples are now polished to scratch fewer surfaces by using emery sheets of grain size 220-1200 and then by using a disc polishing machine they are polished to attain mirror surface finish on all the directions.
2.2. Laser shot peening without coating
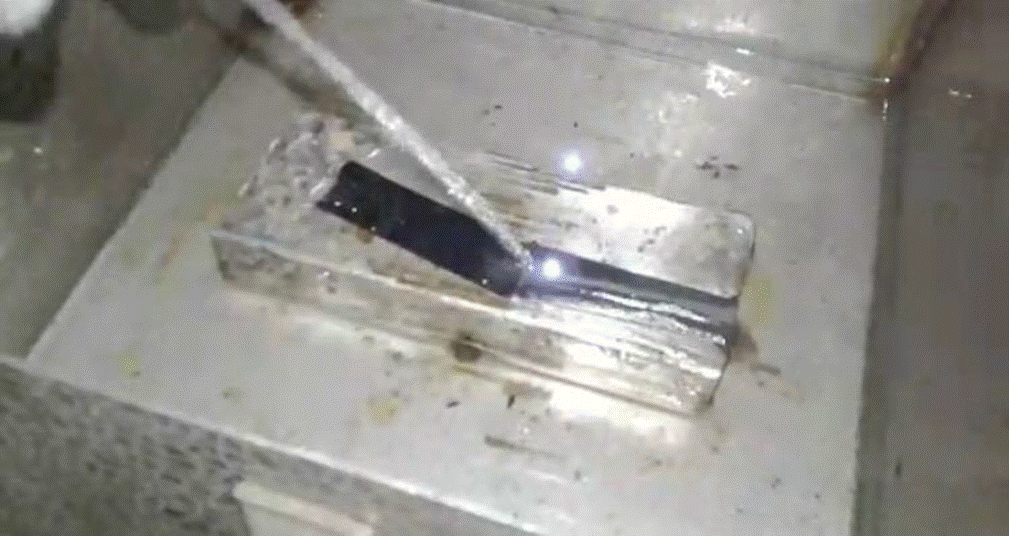
A Q-switched Nd: YAG laser (LPY704G-10, Litron Lasers Ltd., Rugby, UK) was used in the LSP process and its parameters are given in the table 2. The laser comprised of an M2 (beam quality factor) value of 2 and a beam divergence of 0.8 mrad. The beam shape was a top hat profile; therefore, the exhibited radiance density (laser beam brightness) was 345.04 mW cm2 Sr-1 .µm, as determined by the methodology from our previous work. There was no sacrificial coating utilized during the LSP process [6-8]. Hence the name without coating was added to LSP. The experiment was performed on three different samples with different energies on each sample of 200 mJ, 300 mJ and 400 mJ at room temperature (25 °C). The laser beam was delivered to the material surface with the help of a dichromatic mirror and a bi-convex lens of focal length 300 mm. The dichromatic mirror was kept at an angle of 45° and after that the bi-convex lens was placed as shown in Fig 1. The lens is protected from the water spilling during the time of laser peening by an electric drier (blower) which is placed near the lens. The schematic diagram of laser shot peening is given below:
Table 2 Parameters of Q-switched Nd:YAG laser.
| Power | 200 mJ, 300 mJ, 400 mJ |
|---|---|
| Pulse density | 2500 pulses/cm2 |
| Pulse duration | 10 ns |
| Divergence | 0.8 mrad |
| Wave length | 1064 nm |
| Beam diameter | 5 mm |
| Repetition rate | 1 Hz |
2.3. Zinc trivalent plating
The samples are prepared for coating and processed in to pickling tank to remove scales from the surface. HCL with 40- 50% by concentration in water is the chemical used and process is carried for 1 to 2 minutes. Further process is carried in water rinse tank with ordinary water to remove acid solution on the samples. The process is controlled by replenishing samples periodically to maintain Ph4-7. Now the samples have been neutralized in 8 to 10% concentrated NaOH with water in neutralising dip tank for 1 to 2 minutes. Table 3 provides the chemical composition of zinc plating solution. To coat the samples with zinc, a chemical solution is made up with NaOH, Zinc & Surtec 712, Surtec 704 II.
Table 3 Chemical composition of ZINC plating solution.
| Zinc metal | 8 - 14 g/l |
|---|---|
| NaOH | 110 - 140 g/l |
| ST712 | 4 - 8 ml/l |
| ST704 II | 1 ml/l |
| ST704 R | 5 - 15 ml/l |
The zinc plating is carried for 17 to 25 minutes by maintaining the current between 1.5 to 4 amps/ Dm2. It is necessary to maintain the temperature 20 to 40 Deg C. To avoid the carryover of nitric acid to passivation tank the samples are rinsed in water maintaining Ph4-7. To chromate (Trivalent) the Zn plated samples Surtec 680LC chemical used, 125 to 150 MI by concentration in water. This adds passivation to the surface of the samples. It is required to maintain Ph 1.8 to 2.2 and temperature 60 to 70 Deg C. This is carried out for 30 to 90 seconds. Ph can be increased by adding NaOH and decreased by adding Surtec. The thickness of zinc coating is 20 microns which is applied to samples.
2.4. Vickers micro hardness test: (before and after zinc plating)
The Vickers micro hardness test is performed on the laser shot peened samples to determine the variation of hardness value of each sample, shot peened with different energies. It is the resistance of metal surface to indentation, and it is determined by estimating the permanent depth of the indentation. By using 500gf of load to find the hardness value on each sample. The results are collected by software and are displayed in an Excelsheet.
3. Results and discussions
3.1. Microstructural analysis
3.1.1. Optical microscope analysis
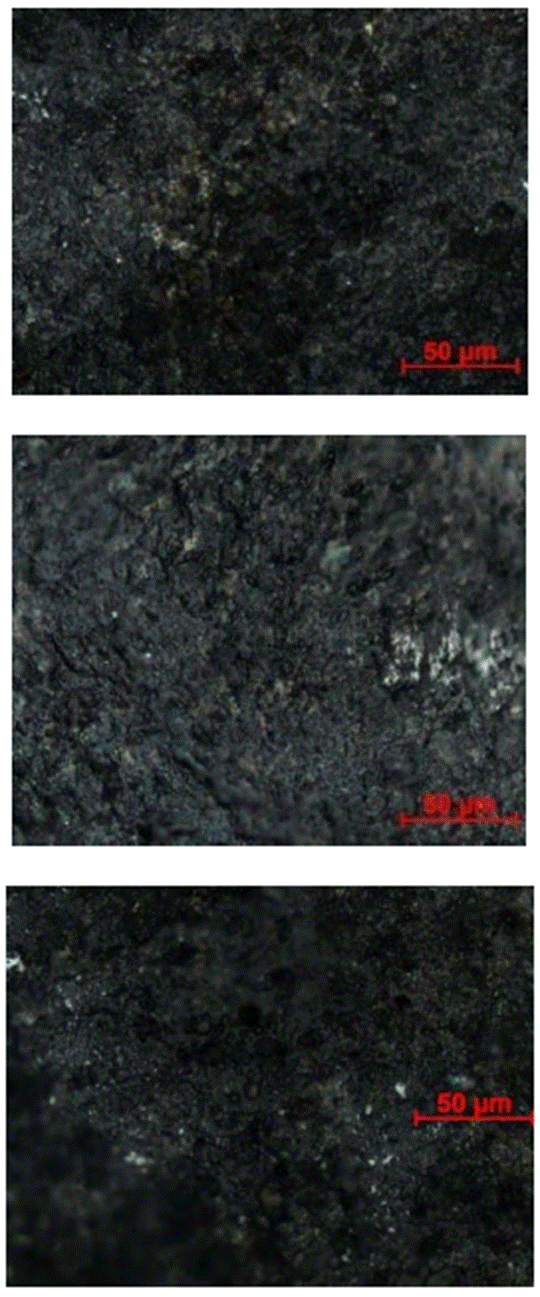
Figure 2 shows the optical microstructure of laser shot peened samples with different energy on each sample exhibiting a deformation in austenite structure. The microstructure images show there is an increase in grain size or grain refinement. There is an increase in cavitations is observed in optical microscopy. The spots formed on the surface of the sample by laser can be observed on optical microscope. The increase in energies suggests there is an increase in cavitations and melted core on the surface of the sample.
3.1.2. SEM analysis
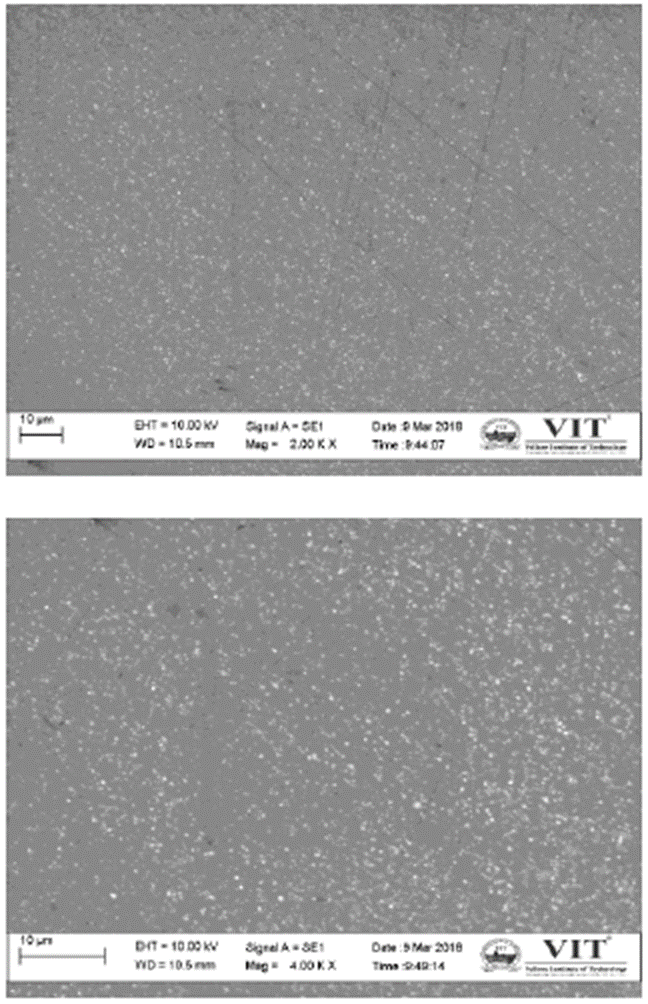
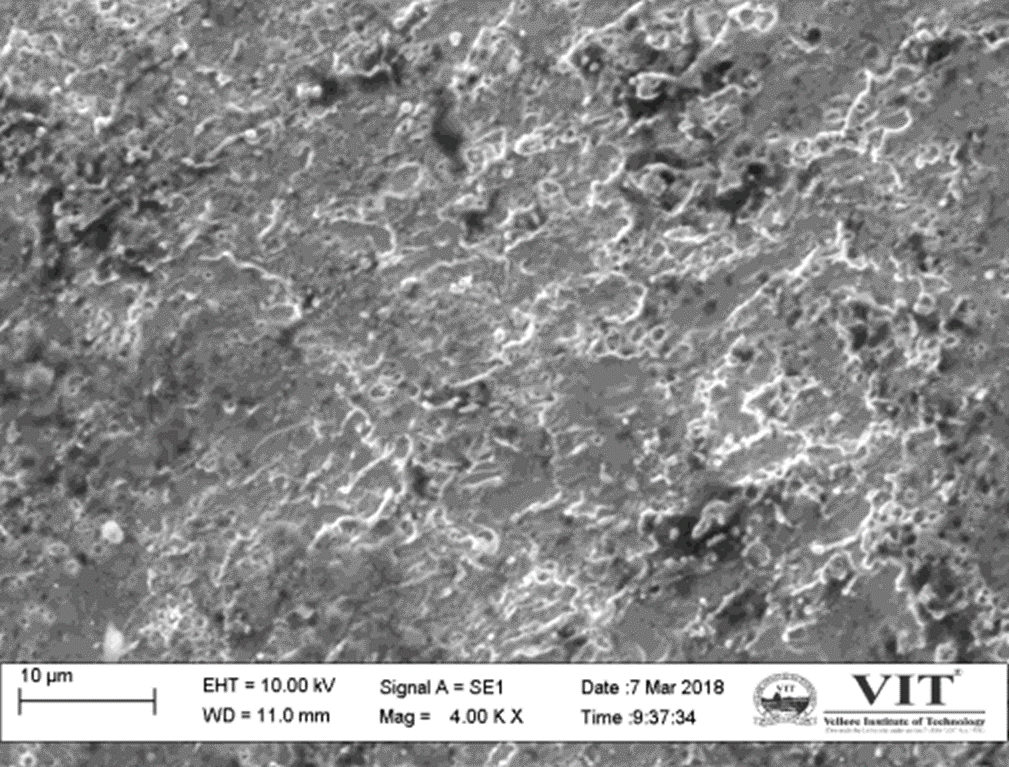
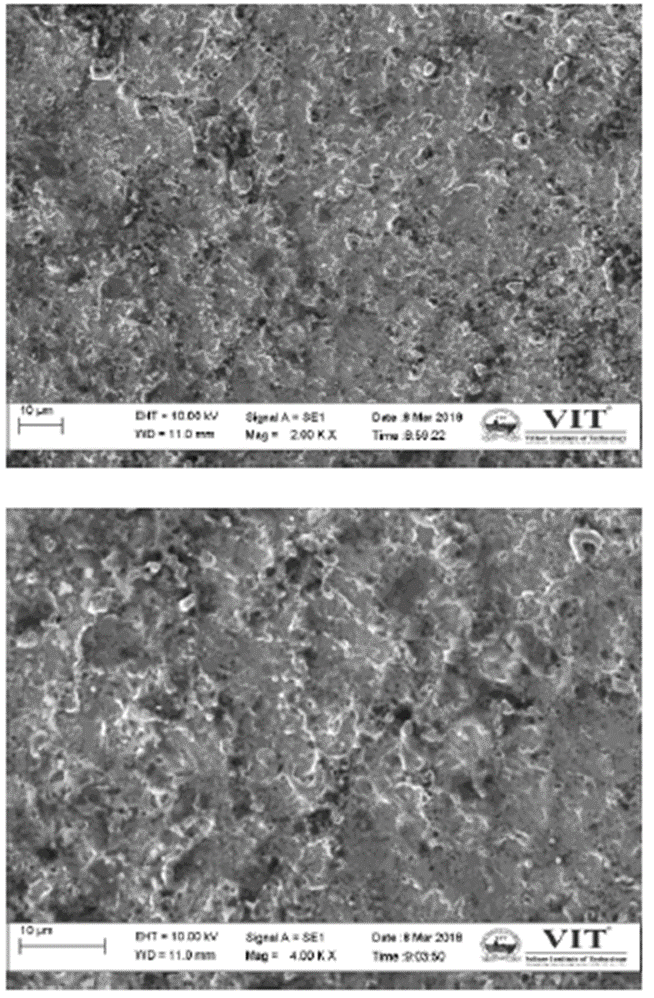
Figure 3 demonstrates the SEM micrographs of sample without LSP at different magnifications and Figures 4-6 show the SEM images of sample after LSP at 2.0KX and 4.0KX magnification of 304 stainless steel surface presented to laser crest by changing energies of laser shots, to be specific 200 mJ, 300 mJ, 400 mJ, separately. The micrograph uncovers an expansion in the lighted territory with increment in the vitality of laser shots. Though much difference is not observed in micrographs, slight variations are observed. The melted inner core is observed in micrographs of magnification 2.00 KX and tendency to incipient melting is seen in the micrographs of higher magnification 4.00 KX. The average grain size in the incipient melting region is found to be ~45µm. Presence of finer striations in the incipient melted core gave the evidence for shot wave propagation (Azhari et al., 2016; Trzaskoma‐Paulette & Nazeri, 1997; Yella et al., 2014).
3.1.3. SEM analysis after zinc coating
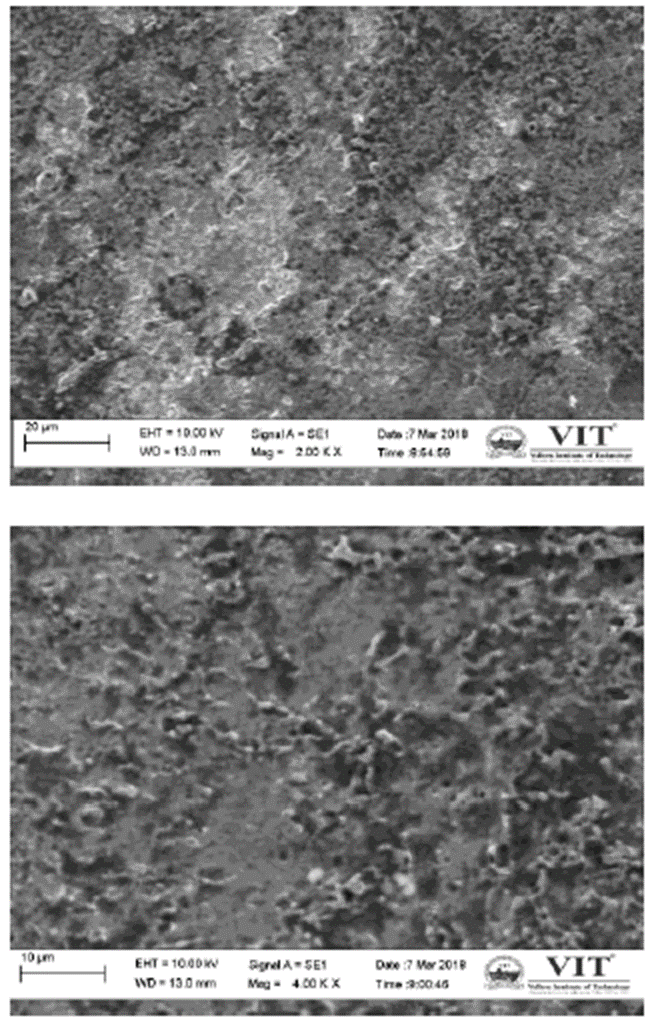
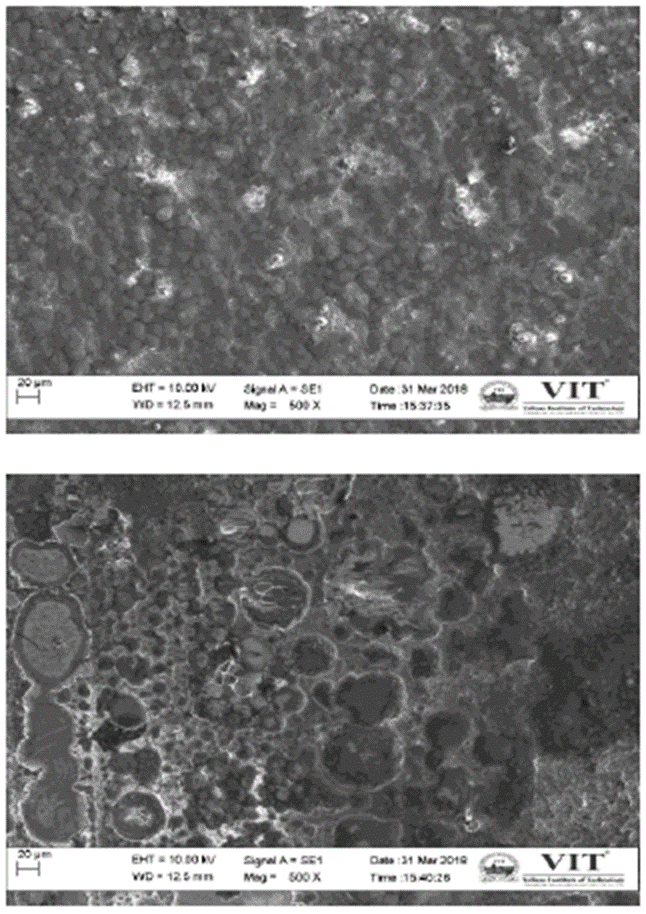
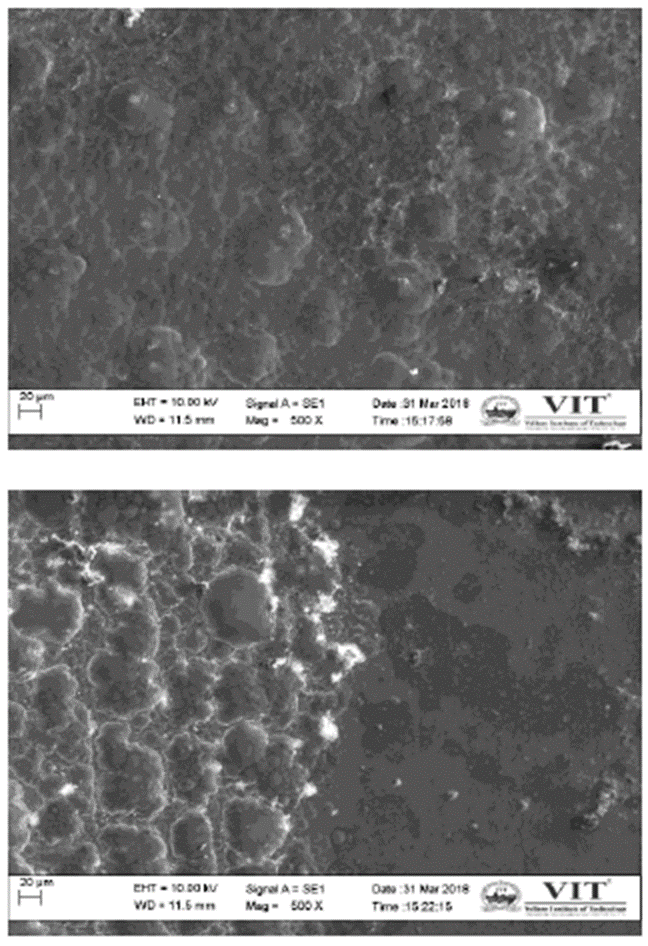
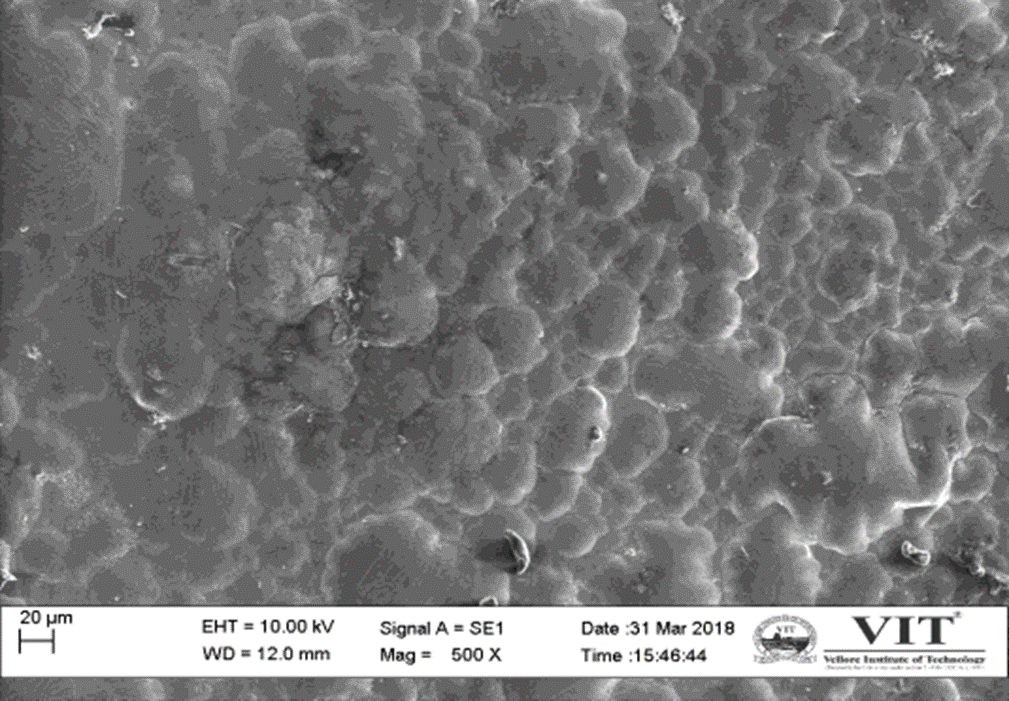
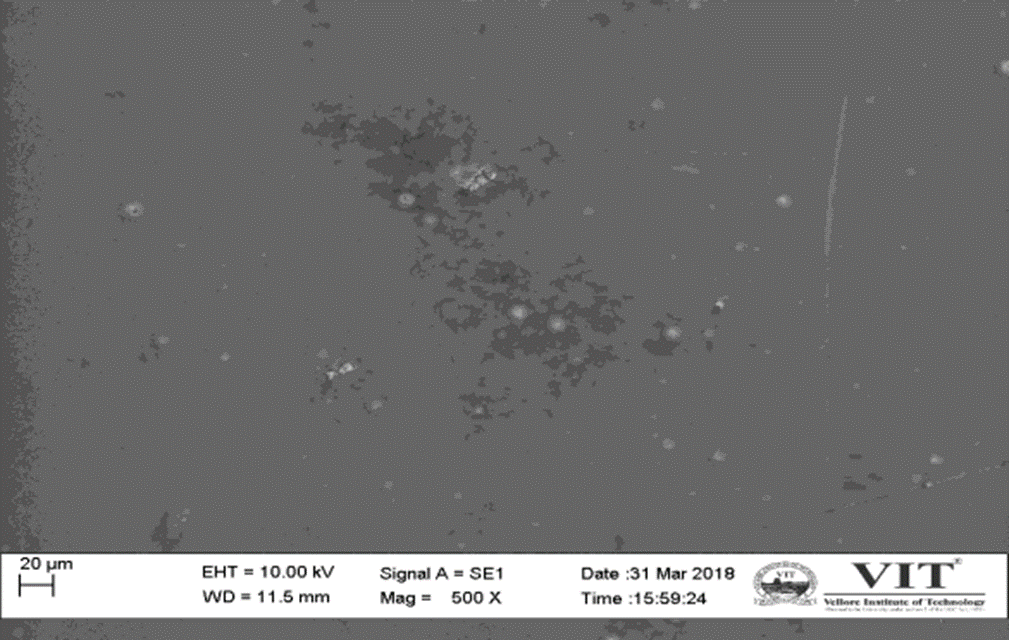
Figure 7-9 show the SEM micrographs with 500X magnification gives the brief idea of morphological changes occurred after applying zinc trivalent plating on the laser peened samples, to be specific 200 mJ, 300 mJ, 400 mJ, separately. The increase in porosity is observed with increasing energy of peening. As increase in porosity implies the increase of surface roughness which attains great adhesive nature to the surface. It is also known that high porosity decreases corrosion resistance. Whereas un-peened sample (Figure 10) coated with zinc has low porosity on the zinc surface. Intermetallic alloy layer formed between the zinc coat and steel substrate. Massive spalling and corrosion pits are seen on the edges of the coated surface. Spalling and corrosion pits are reduced with increasing peening energy. The white spots are corrosion pits (Gui et al., 2017; He et al., 2014; Osifuye et al., 2014).
3.2. EDAX results
EDAX of AISI 304:
Spectrum processing: AISI304A
Peak possibly omitted: 1.760 keV
Processing option: All elements analysed
Number of iterations = 3
3.3. Vickers micro hardness results
The hardness reaches a maximum value at the depth where CRS (compressive residual stress) reaches its peak value in case of LSP specimen peened with 400 mJ energy and then goes on decreasing gradually. LSP includes an elevation in thermal energy, such thermal effects are observed only at the surface of the material; they cannot be observed inside the material.
The average hardness value of AISI 304 sample is found to be 140 HV. Whereas the average Vickers hardness value of the laser shot peened sample with 400 mJ energy is found to be 180 HV. The percentage increase in the hardness value after peening is around 22%-28%. The hardness value of steel sample laser shot peened with 200 mJ, 300 mJ, 400 mJ energies are increased by 13%, 22% and 28.5% when compared with normal unpeened sample which is listed in Table 4-6. The average hardness value of the unpeened Zn-coated sample is found to be increased 21% when compared to the hardness value of normal sample. Whereas the hardness value of the laser shot peened samples with energies 300 mJ and 400 mJ is found to be unaltered after plating with zinc. But, the hardness value of sample shot peened with 200 mJ of energy is increased by 24% after coating with zinc. The increase in the hardness value of the 200 mJ sample when compared with normal AISI 304 stainless steel is about 45%. The results are in coincidence with those published earlier by Prabhakaran et al. (2018).
Table 4 Hardness values of 200 mJ laser peened sample after zinc coating compared with other samples.
| When compared to | Increased by |
|---|---|
| Normal AISI 304 sample (average 140HV) | 45% |
| Laser shot peened with 200 mJ energy (average 165 HV) | 24% |
| Unpeened Zn-coated steel (average 170 HV) | 20.5% |
Table 5 Tabulated hardness values of laser shot peened samples with different energies.
| Energy (mJ) | No | Measurement Position (mm) | Load | Diagonal (µm) | Hardness HV | Conv. Scale | Conv. Hardness | |||
|---|---|---|---|---|---|---|---|---|---|---|
| X | Y | Distance | D1 | D2 | ||||||
| 200 | 1 | 2.956 | 1.259 | 3.213 | 500 | 55.38 | 57.97 | 167.3 | HRC | 25.2 |
| 2 | 2.956 | 0.947 | 3.104 | 500 | 57.34 | 56.43 | 162.9 | HRC | 24.5 | |
| 3 | 2.956 | 0.632 | 3.022 | 500 | 59.45 | 61.62 | 171.0 | HRC | 25.8 | |
| 300 | 4 | 2.274 | 0.241 | 2.287 | 500 | 56.85 | 57.7 | 182.6 | HRC | 27.5 |
| 5 | 2.274 | 0.457 | 2.319 | 500 | 56.00 | 61.68 | 167.8 | HRC | 25.3 | |
| 6 | 2.274 | 2.069 | 3.074 | 500 | 59.27 | 57.28 | 173.0 | HRC | 26.1 | |
| 400 | 7 | 2.274 | 2.069 | 3.074 | 500 | 55.43 | 57.56 | 190.5 | HRC | 28.5 |
| 8 | 2.274 | 1.022 | 2.493 | 500 | 66.09 | 56.99 | 144.8 | HRC | 21.3 | |
| 9 | 2.956 | 1.259 | 3.213 | 500 | 56.42 | 56.28 | 192.0 | HRC | 28.7 | |
Table 6 Tabulated hardness values of zinc-coated samples after laser peening with different energies.
| Energy (mJ) | Measurement Position (mm) | Load | Diagonal (µm) | Hardness HV | Conv. Scale | Conv. Hardness | |||
|---|---|---|---|---|---|---|---|---|---|
| X | Y | Distance | D1 | D2 | |||||
| AISI 304 (unpeened) | 0 | 0 | 0.000 | 100 | 44.06 | 46.47 | 170.0 | HRC | 0.0 |
| 0.985 | 0.043 | 0.986 | 100 | 42.64 | 45.62 | 170.8 | HRC | 0.0 | |
| 1.237 | 0.006 | 1.237 | 100 | 39.08 | 45.05 | 172.6 | HRC | 0.0 | |
| 200 | 2.345 | 8.858 | 9.163 | 100 | 32.40 | 30.27 | 205.6 | HRC | 8.2 |
| 2.497 | 10.898 | 11.180 | 100 | 27.85 | 31.41 | 211.2 | HRC | 13.6 | |
| 3.224 | 10.73 | 11.204 | 100 | 28.42 | 29.99 | 217.4 | HRC | 14.9 | |
| 300 | 1.778 | 8.858 | 9.035 | 100 | 34.53 | 31.69 | 182.9 | HRC | 2.9 |
| 3.988 | 11.14 | 11.832 | 100 | 32.26 | 32.83 | 185.4 | HRC | 4.5 | |
| 3.233 | 1 1.14 | 11.600 | 100 | 32.26 | 32.69 | 188.8 | HIC | 4.8 | |
| 400 | 3.988 | 11.14 | 11.832 | 100 | 32.26 | 32.54 | 190.5 | HRC | 5.0 |
| 3.233 | 1 1.14 | 11.600 | 100 | 30.13 | 33.54 | 179.6 | HRC | 6.7 | |
| 1.237 | 8.844 | 8.930 | 100 | 30.98 | 32.26 | 189.6 | HRC | 7.3 | |
3.4. MAHR roughness value
The surface roughness values are of the unpeened sample and the peened specimens with different energies are calculated after applying zinc trivalent coating on the samples and listed in Table 7. Taking into consideration the following factors 1) Ra: average roughness, 2) Rq: root means square roughness and 3) Rz: maximum height of the profile. It is evidently known that surface roughness increases due to surface ablation of metal surface after laser shot peening. There is an increase in roughness (Ra, Rz and Rq) 300 mJ LSP sample up to 59%, 45% and 50% when compared with unpeened sample. The table indicates the increase in surface roughness of LSP samples without coating. The graph demonstrates roughness unpeened and LSP 300 mJ samples. Similar investigations have been reported previously by Prabhakaran et al. (2018), Liu et al. (2012), Zhan et al. (2012).
Table 7 Tabulated surface roughness values of Laser peened samples before coating.
| LSP Energy | Ra(µm) | Rz(µm) | Rq(µm) |
|---|---|---|---|
| Unpeened | 0.0519 | 0.4197 | 0.0850 |
| 200 mJ | 0.3577 | 2.3557 | 0.4831 |
| 300 mJ | 0.3812 | 2.5363 | 0.4999 |
| 400 mJ | 0.4199 | 2.5546 | 0.5276 |
It is known that the corrosion of the material depends up on the surface roughness values of the sample. The surface roughness of the samples of zinc-coated samples after laser shot peening is calculated using Mahr roughness test and are given in Table 8 It found that the sample peened with 300 mJ has the highest increase in roughness values after coating with zinc. After coating with zinc 300 mJ LSP sample have increased its roughness about 8 times.
Table 8 Tabulated surface roughness values of laser peened samples after coating with zinc.
| LSP Energy | Ra(µm) | Rz(µm) | Rq(µm) |
|---|---|---|---|
| Unpeened | 0.0554 | 0.7700 | 0.0912 |
| 200 mJ | 2.6907 | 13.7217 | 3.8622 |
| 300 mJ | 3.2241 | 18.5619 | 5.8607 |
| 400 mJ | 1.9637 | 10.6547 | 2.8129 |
Graph representing ro.ughness of AISI 304:
Graph representing roughness of AISI 304 after laser peening at 300mJ energy:
Graph representing roughness of unpeened zinc-coated sample:
Graph representing roughness of 300 mJ laser peened sample after coating with zinc:
4. Conclusions
The laser shot peened sample with 400 mJ of energy shows highest increase of hardness value by 28% when compared to unpeened sample. The hardness value of zinc-coated 200 mJ samples (205HV) after coating is better increased by 20% when compared to uncoated 200 mJ sample. The sample peened with low energy show more hardness than those of high energy peened samples.
SEM micrographs of laser shot peened sample reveal there is an in increase in irradiated area with increasing energy of laser peening. The increase in incipient melted core is observed with increasing peening energy with 4.00 X magnification. Increase in porosity is observed in the SEM micrographs of zinc-coated samples after laser peening. The amount of spalling and corrosion pitting is reduced with increasing energy of laser peening.
The laser shot peened sample with 200 mJ of energy is found to have better accumulation of zinc with 57% and have carbon, oxygen with 15%, 27% respectively when compared to that of other peened samples and unpeened sample. Reduction in the amount of Fe, Ni elements after zinc coating on laser peened samples helps in reducing the corrosion effect. Absence of metal elements like Fe, Ni and Cr reduces the toxicity of blood when used for biomedical implants.
After laser shot peening the roughness values (Ra, Rz, Rq) of 300 mJ sample is increased by 59%, 45% and 50%, it is more increased for 400 mJ sample. But, after plating with zinc on peened area roughness value is better increased for 300 mJ sample than that of 400 mJ sample. Indeed, helping to improve the adhesive nature of surface so much of increasing surface roughness may tend to reduce corrosion resistance of the surface. It is suggested to use the coated samples according to the requirements of mechanical properties, topographical properties and morphological properties.


 nueva página del texto (beta)

